|
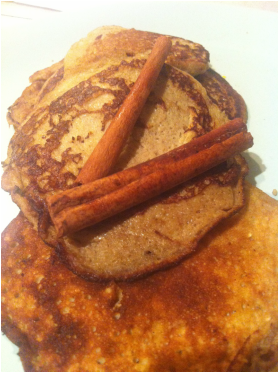
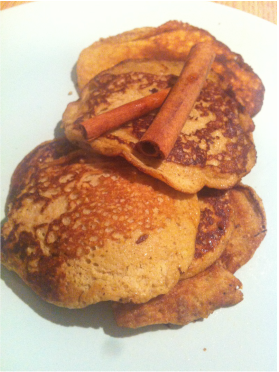
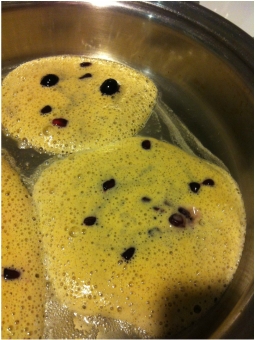
YES, you read that right. TWO ingredients! I saw a friend post a photo of her 2 ingredient creation last weekend and I immediately set out to make some for myself and the hubby. I was extremely happy with the results that I've already made them twice this week. So much more effortless than normal pancakes, very delicious, and the best part: guilt free! Even the hubby whose least favorite food is eggs devoured them. You Will Need: - 2 eggs - 1 large banana Now these are the basic ingredients. You can make the pancakes using just the above 2 or you can add a few more optional ingredients if you have them on hand, such as: - baking powder (1/8 teaspoon) - highly recommended as it makes the pancakes fluffier - ground cinnamon (1/4 teaspoon) - also recommended as it adds a nice flavor - fruit (I tried them with frozen blueberries and pomegranates - yum!) - chocolate chips - whatever you like in your pancakes Throw the eggs and banana (and baking powder and cinnamon if using them) into a food processor or blender and blend together. If you do not have one of these devices, just mash the banana and then add the eggs (and optional ingredients) and stir together. If using fruit or chocolate chips, add while the pancake is cooking rather than mixing into the batter (see next step). Lightly grease a griddle or non stick pan with oil or cooking spray and heat on medium heat (if you only have a stainless steel pan, read on). Pour a little bit of batter into the pan to form circles. These pancakes are best made small and thin. Add fruit and/or chocolate chips on the top of the pancake right after you pour the batter in, otherwise they will stick and burn to the pan (I learned this the hard way).
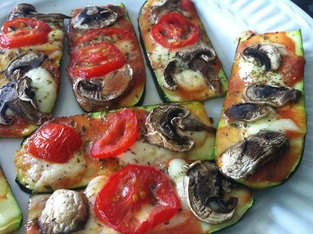
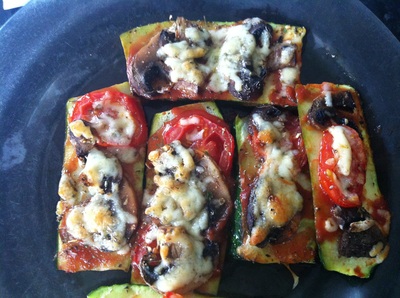
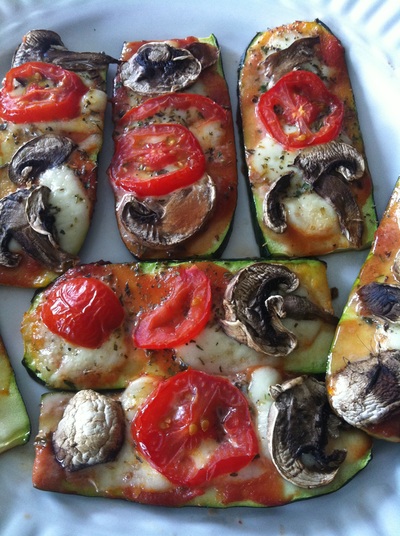
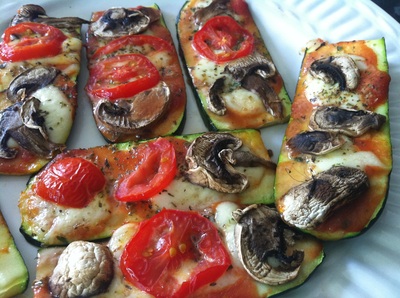
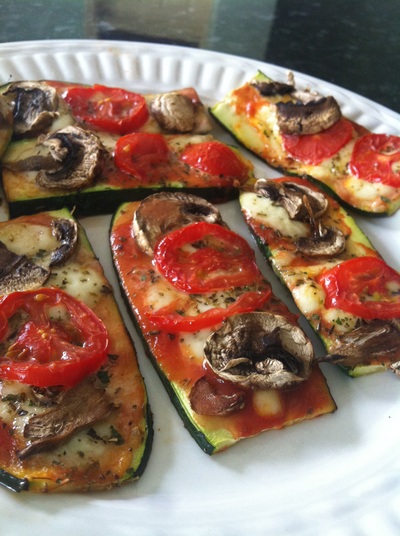
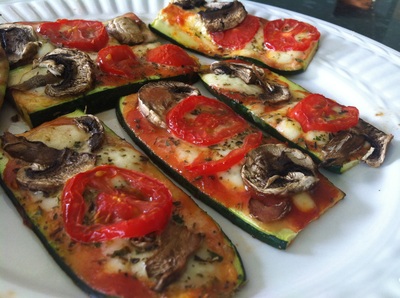
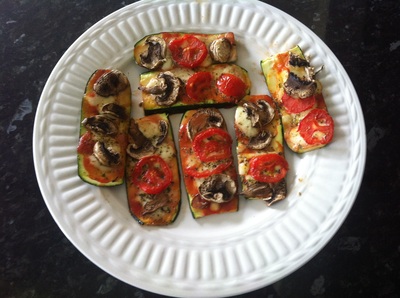
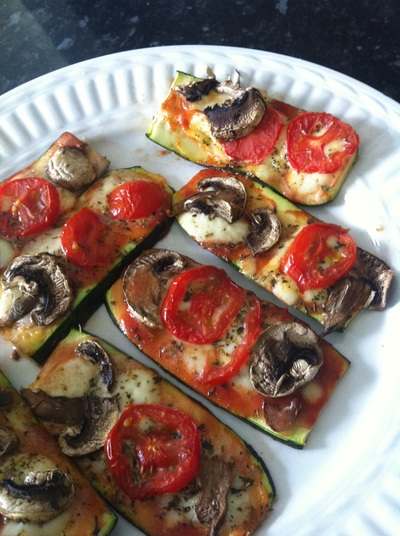
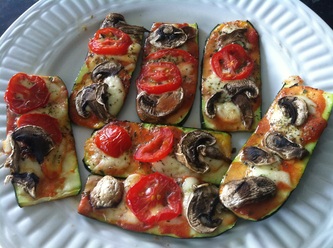
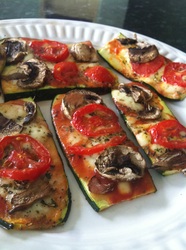
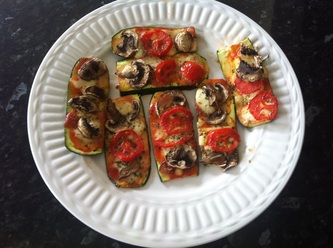
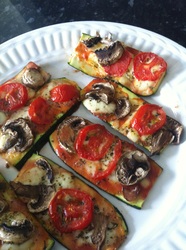
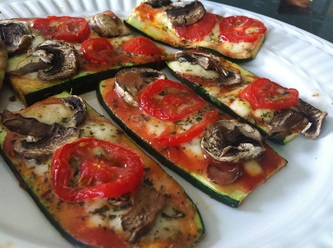
Let's face it, most of us LOVE pizza. There may be times when you want to enjoy some delicious pizza but perhaps have a gluten intolerance, feel the need to watch your carbs, or simply don't have the ingredients or time to prepare pizza dough. These are some of my tried and tested go to alternatives to pizza dough that have allowed me to devour one of my favorite foods at times when I did not think it was possible! 1. Zuchini/Corguette Pizza Slices
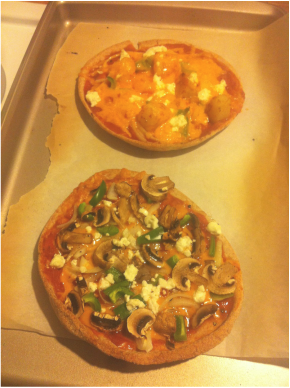
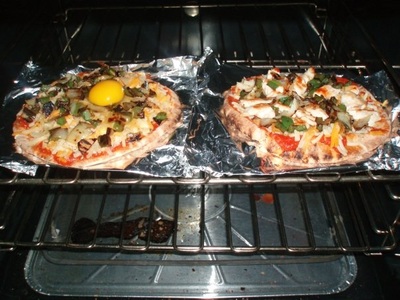
2. Pita Bread Mini Pizzas
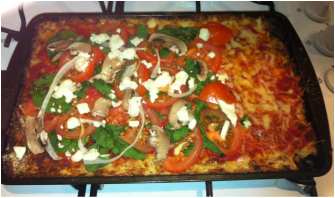
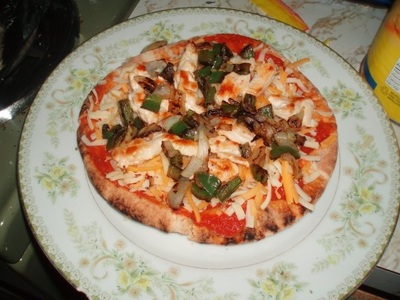
3. Cauliflower Pizza Crust
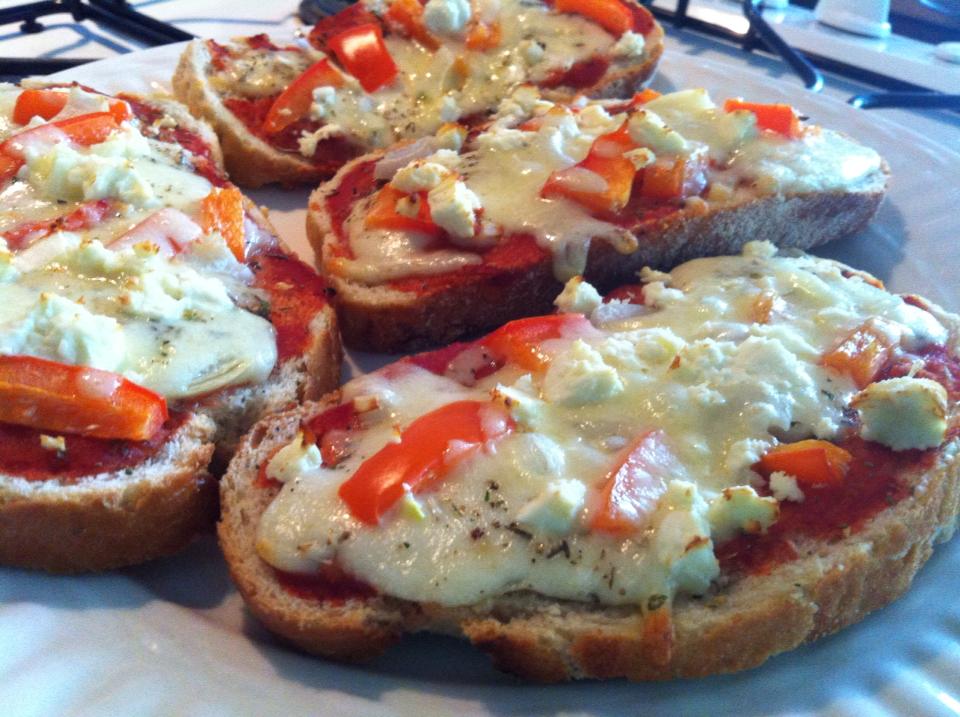
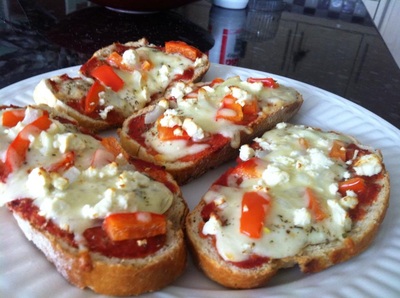
4. Baguette Pizza Bread
There really are endless possibilities when it comes to making pizza and now there also seem to be endless possibilities for the pizza crust as well. There are plenty more alternatives out there than the ones I have listed but these are just some of my favorites. What are some of your favorites and some that I should try out?! I'd love to hear your suggestions and also let me know if you try any of the above out!
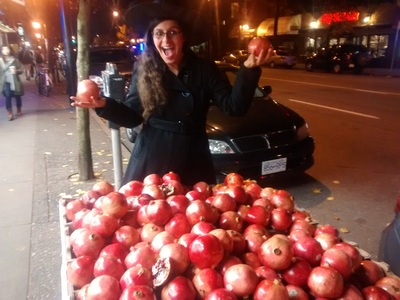
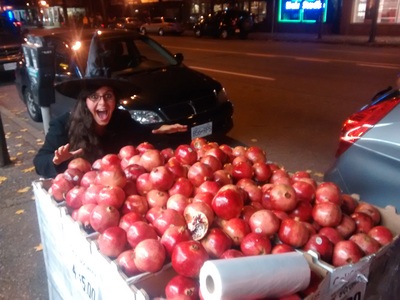
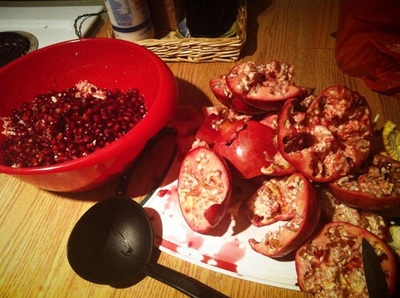
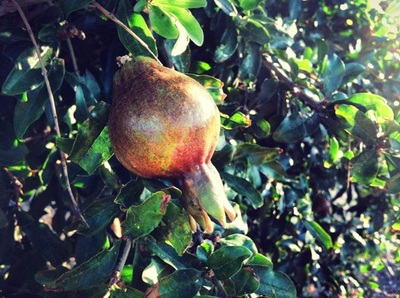
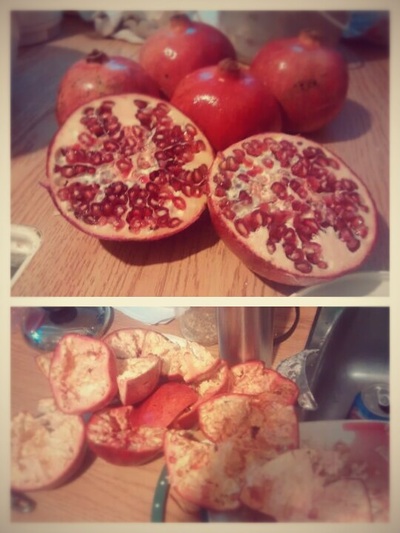
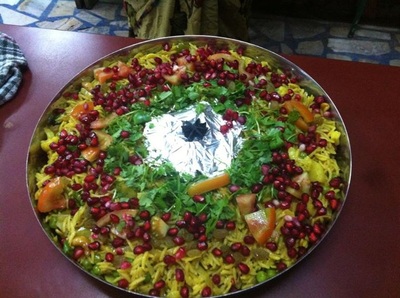
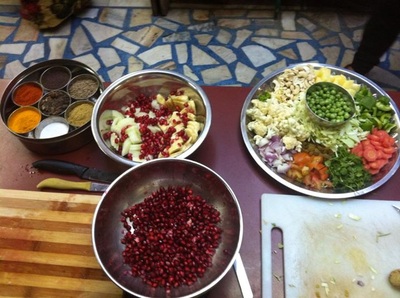
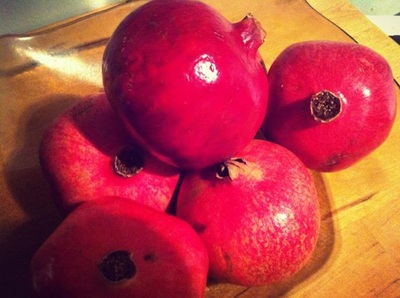
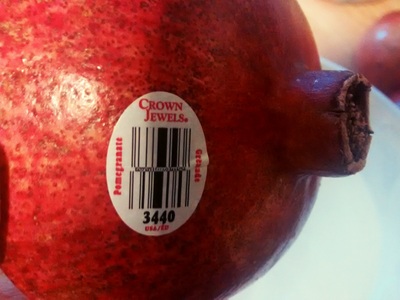
I leave you with some more photos of my pizza crust alternative adventures. Click on the photos for a description. Bon Appetit! Edit: Shortly after publishing this blog post, I learned that November is actually National Pomegranate Month. I had no idea there was a month to celebrate pomegranates but it worked out well that I posted this in November...now let's celebrate this amazing fruit! 'Tis my favorite time of year as far as fruit is concerned. Actually, I really dislike this time of year mainly due to the weather (I honestly believe that I have SAD and living in a city that is nicknamed Raincity doesn't help). BUT, this time each year, the moment that I see the first pomegranate of the season sitting on a market shelf, I turn into a giddy school girl and I stock up. There could be a torrential downpour outside but those amazing fruits always have a tendency to turn my frown upside down. I felt it only right to dedicate an entire blog post to the fabulous fruit that is the apple of my eye (pun intended). Why am I so obsessed with this amazing, juicy, delicious fruit you ask? Besides the fact that it tastes like heaven, looks beautiful in a fruit bowl, has plenty of health benefits, and enhances my mood? I think it comes down to the fact that I had a pomegranate tree in my backyard when I was a wee lass growing up in Greece and just makes me extremely nostalgic for the Mediterranean. Also in Greece, and I believe many other countries and cultures, the pomegranate is a very symbolic fruit symbolizing fertility, abundance and good luck. Many families have pomegranate decorations throughout their home and it is a fruit that is used in various ceremonies. The fruit is also prominent in the ancient Greek myth of Persephone, goddess of the underworld which is associated to the aforementioned symbolism. That's it, my obsession purely comes down to nostalgia. And maybe the nostalgia it creates for a warmer climate makes me forget about the dreadful weather in Raincity. But lets not get carried away with over analyzing why I am obsessed with pomegranates and talk more about the fruit itself. Now I know what you are all thinking: "How could you love a fruit that is such a pain in the butt to consume? So much effort to clean for such a little amount!"...well, my friends, this too is how I felt prior to last year. I would buy 5 pomegranates at a time and I just couldn't find the time (or patience) to de-seed them all before they would go bad...that is until I saw THIS, and it changed my life for the better (watching this may make you pomegranate obsessed as well. You have been warned): And ever since this magic came into my life, I get a joy out of de-seeding and devouring this wonderful fruit! I de-seed a bunch of them at a time and keep a container of them in my fridge (or freezer if I don't think I will eat them in time) and then they are readily available for me to throw in my yogurt, my oatmeal, in a smoothie, a salad, or just to eat as is. When we were in India in February 2013, we participated in a cooking class where we made a vegetable biryani that had pomegranate seeds inside! That was delicious! How do you like to use pomegranates? Do you have any recipes that you use pomegranate in? And as I sit here and write about my favorite fruit, while, not surprisingly, devouring some delicious pomegranate seeds, I wonder do you have a fruit that you obsess over or am I just a special case?
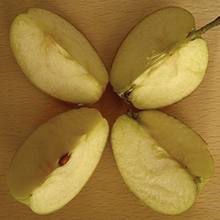
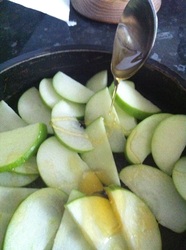
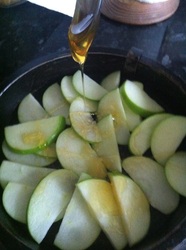
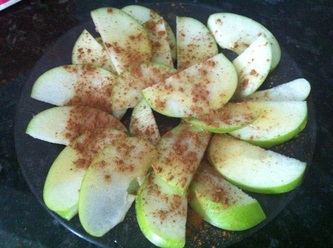
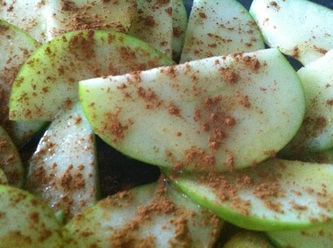
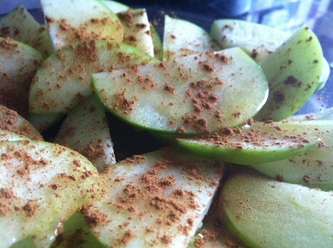
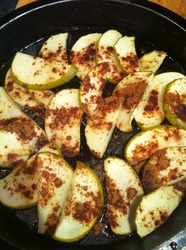
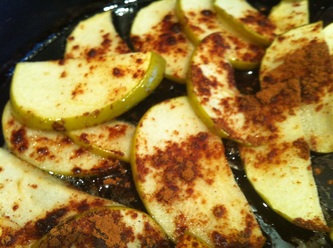
I leave you with a gallery of various pomegranate inspired photos I have taken in the past few years....click on the photos for a description! Enjoy! The last six weeks were spent in Italy, Greece, and Paris with my husband Perry finishing off our extended honeymoon (which explains my absence from blogging). We spent lots of time wining, dining and cooking (oh yeah, and relaxing) and we learned lots of new recipes to add to my collection. From our many hosts, my family in Greece, and just from the various inspirations from the many places we visited, I collected enough recipes, notes and ideas to keep me busy in the kitchen for weeks to come. I will be sharing these recipes as I recreate them so keep checking back or follow me on Twitter to be informed of any updates. The first recipe was introduced to us on the last stop of our trip: Paris! Our host Eleni, a Greek national studying in Paris, had a fantastic kitchen full of great ingredients, Greek honey included! Greeks love to mix honey with other ingredients and in their deserts. Honey with yogurt, honey with almonds, honey with raki...and now we were about to discover honey with apples. Eleni made this for us the first night we arrived...and we ended up making it for Eleni and her boyfriend Monsuy for the following 3 nights we were there....we are hooked! The best part is, this is relatively healthy and very simple to make AND super satisfying to the taste buds and the belly! You will need: - Apples. I use 1 per 2 people because you get quite a large amount once it is sliced. Also, we used Granny Smith apples as the tartness goes well with the honey and cinnamon - Honey - Cinnamon Directions: 1. Slice the apples into thin slices. I start by slicing the apple in half and then half again so you end up with four segments (see photo below). I then remove the seeds and slice each quarter into thin slices. 2. Place the slices on a plate. Try to not layer them too much so that each slice gets a bit of honey and cinnamon on it (think of it like making nachos and cheese...you always go for the tortilla chips with cheese on it, don't you?! So make sure every apple has a bit of the honey and cinnamon on it!)
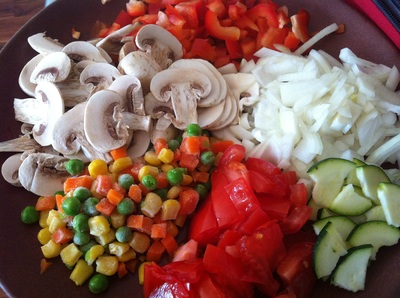
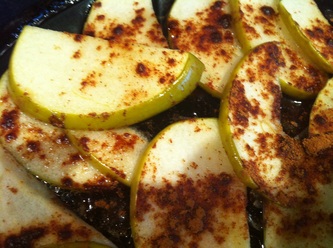
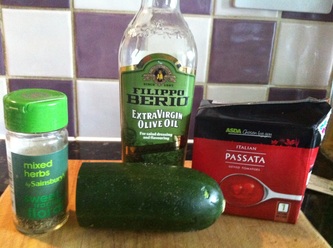
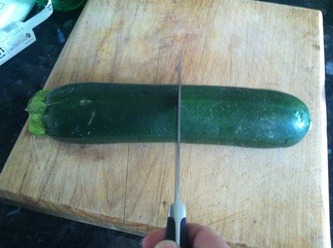
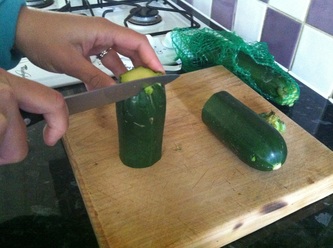
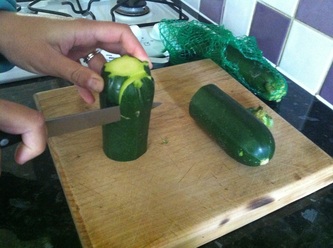
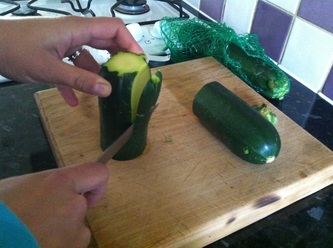
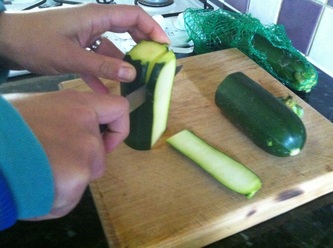
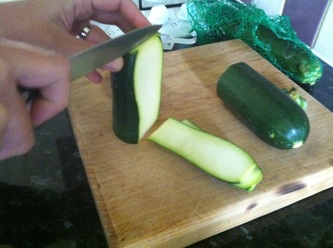
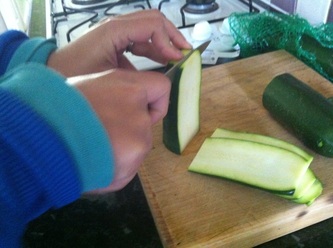
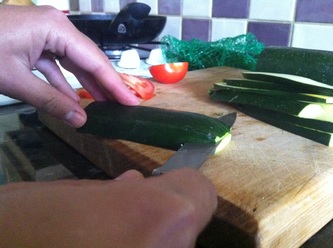
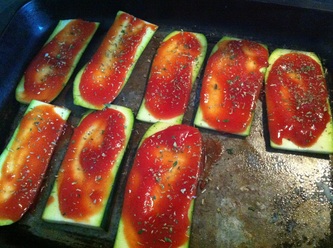
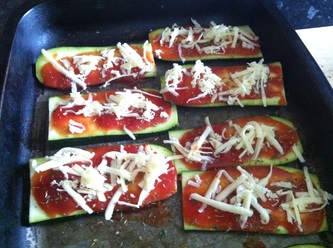
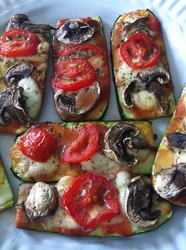
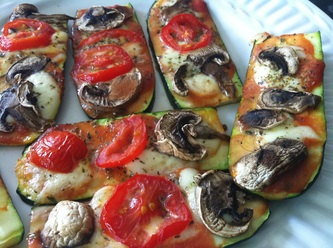
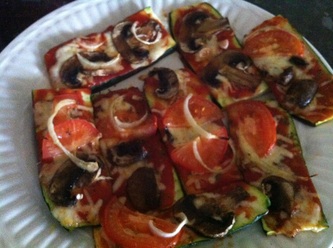
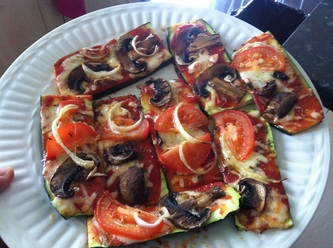
3. Drizzle honey on top of the sliced apples 4. Lick the spoon. You don 't want that honey to go to waste! 5. Sprinkle cinnamon on top of the apples with honey. There you go! A nice and simple treat or desert that takes 2 minutes to prepare! Notes: This is a great snack and/or desert for the summer. For the colder months, you can place the above recipe in the oven and roast the apples (with the honey and cinnamon on top). I tried this as well and it was also nice but I do prefer it colder. What I did like about the roasted recipe though, was that the honey turned syrupy which was nice to "mop up" with the apples . You can also drizzle some lemon juice on top of the apples when roasting for a sweeter taste. Also, a different variety of apples (besides Granny Smith) may taste nicer when roasted as we found they didn't work so well (because of the taste). If any of you try this recipe with a different variety, let me know how it turns out! Enjoy and happy cooking!! Click on the photos below for descriptions Pizza is one of my favorite foods. However, I seem to constantly try and eat healthy and pizza definitely does not help with the weight loss. I have tried the cauliflower pizza base and as much as I love it, I find it to be quite time consuming to prepare. I saw a photo of sliced zucchini with Parmesan cheese on top of it one day and thought, "hey, that looks like it could be used as a pizza base". So I gave it a try, as I do like to be inventive with food, and fell in love- not just with the taste, but also with the ease and minimum preparation time. Of course, the photos went up on Facebook and all the questions of how I made it came in so here we go folks:. Ask and you shall receive. When necessary, click on the photos for descriptions. Things you will need: -Zucchini/Courgette (the amount depends on how many you want to feed and how big the zucchini is. If it is a big fat one, for lack of better description, I tend to use half of the whole zucchini per person. If it is relatively small, then one whole one per person should do.) - Olive oil - Crushed tomatoes (aka Tomato Passata, pureed or sieved tomatoes in the UK ), or plain 'ol pizza sauce - Dried or fresh mixed herbs or oregano (this ingredient is key to giving it a pizza flavor) - Your favorite pizza toppings (tomatoes, onions, mushrooms, peppers, onions, feta, cheese, olives, pineapple etc) Steps (see photos for assistance): 1. Cut the zucchini in half. This makes it easier to slice as you will have a flat surface to stand it on for slicing. Also, it is easier to serve half a slice of zucchini as if the slices are the length of a whole large zucchini, they may end up being longer than the plate. If you have long/oval platter style plates, then feel free to leave it long. 2. Slice the zucchini in strips, roughly a 5mm thickness. Try and make all the slices the same thickness. When getting near the end of the zucchini, it may be easier (and safer) to place it down on the cutting surface and slice it that way (see photos) 3. Place zucchini slices in a lightly greased ovenproof dish/pan. Place about a teaspoon size amount of the tomato/pizza sauce on each slice. The amount of sauce depends on the area of the slice that needs covering and how much you really like tomato sauce. Use the curved bottom of the spoon to spread the sauce on the slice of zucchini. 4. Sprinkle dried or fresh mixed herbs or oregano on top of the sauce. I like to use a lot of this as I find it gives it a real pizza flavor. 5. Add cheese on top of the sauce. I find that adding cheese allows for the pizza toppings to stick to it so that they don't all fall off when eating. I have tried this recipe with both cheddar cheese AND mozzarella and both are good. Mozzarella tends to be a little bit lighter than cheddar cheese and also more authentic. You can easily find mozzarella balls in a grocery store and just slice them into small pieces to place on the zucchini slices (or just use grate mozzarella as well). The mozzarella melts quite nicely. I have also tried it with adding the cheese on top of the pizza toppings but the toppings don't stay on so well then. 6. Now, on top of the cheese, place your toppings. The surface area is not very large so you may want to put a couple toppings on each slice, or cut your toppings very small if you want a lot of flavors on there. You could also do one topping per slice and have a different topping on each slice. This is entirely up to you and your personal preference. Drizzle a little bit of olive oil on top of each slice. 7. Place in a preheated oven. About 350 degrees Fahrenheit (or 170 degrees Celsius in a fan assisted oven). Allow to cook for about 15-20 minutes or until the cheese is melted and the toppings are cooked to your liking. You don't really need to worry about overcooking. Check back after about 10 minutes to see how it is coming along and if the toppings are cooked to your liking. 8. When it looks like it is done to your liking, take the dish out of the oven and use a flat spatula to transfer the zucchini slices onto a plate. Now you are ready to devour this relatively healthy and gluten free alternative to pizza! Bon Appetit! Notes: - Cooking it in this way makes the zucchini just slightly cooked and crunchy. If you prefer it to be more well done and crispy, then grill the zucchini slices to your liking prior to placing the sauce and toppings on top. - I find the easiest way to enjoy this dish is to eat it with a fork and knife. It doesn't have the ease that pizza does of eating it with your hands. - Zucchini and Courgette are two of my least favorite words to spell correctly. Why do both terms for this vegetable need to be so foreign and complicated?! Hope you enjoyed this recipe. If you try it out, let me know how you like it! Feel free to contact me with any comments or questions.
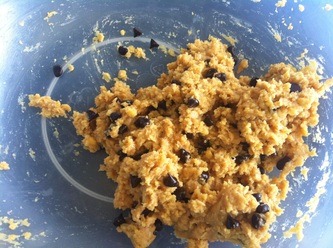
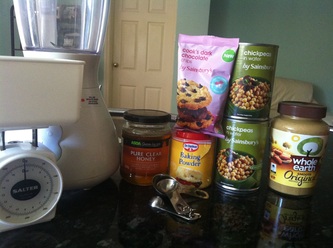
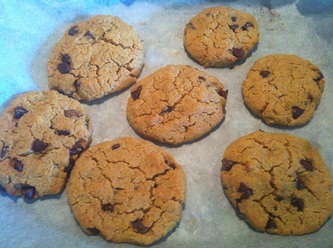
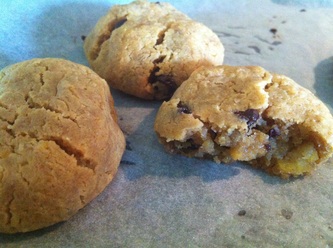
Happy Cooking and Enjoy! Ok so I am SUPER excited about this recipe that I just tried out and have to share it with all of you! It is perfect if you are coeliac/ have a gluten intolerance and they are relatively healthy as there is no sugar, no flour, no oil, and no eggs! I saw the recipe from Jump on the Skinny Bandwagon circulating around Facebook and I am always intrigued by recipes that substitute certain ingredients for ones that you would never think of (such as cauliflower pizza dough). Here is the recipe as copied from the circulating status on Facebook. See below for my notes and things I did differently: Ingredients: 1 1/4 cups canned* chickpeas, well-rinsed and patted dry with a paper towel 2 teaspoons vanilla extract 1/2 cup + 2 tablespoons (165 grams) natural peanut butter (can use PB2 from gym to make healthier, check your labels ) 1/4 cup (80 grams) honey (agave would be amazing too!) 1 teaspoon baking powder** a pinch of salt if your peanut butter doesn’t have salt in it 1/2 cup (90 grams) chocolate chips * My can was a 400 gram can, 240 grams without the water, and I used all but a few tablespoons ** If you need grain-free baking powder, you can use 1 part cream of tartar + 1 part baking soda + 2 parts arrowroot. Directions: Preheat your oven to 350°F / 175°C. Combine all the ingredients, except for the chocolate chips, in a food processor and process until very smooth. Make sure to scrape the sides and the top to get the little chunks of chickpeas and process again until they’re combined. Put in the chocolate chips and stir it if you can, or pulse it once or twice. The mixture will be very thick and sticky. With wet hands, form into 1 1/2″ balls. Place onto a piece of parchment paper. If you want them to look more like normal cookies, press down slightly on the balls. They don’t do much rising. Bake for about 10 minutes. Yields about fourteen 1 1/2″ cookie dough balls. My notes and things I did differently: First of all, I don't have a food processor so what I did is I used a blender (you can also use a magic bullet) to grind up/puree the chick peas. But you have to make sure to only do a little bit at a time as if you put in too many chick peas, the blade won't be able to grind them all. So out of the total amount of chick peas used, I divided them into about 4 portions to do the blending/grinding. When you blend them, the chick peas can tend to go to the side of the blender so shake the blender a little bit every so often to move them around and back in the area of the blade. Then, once each portion is grinded, I pour them out into a mixing bowl. You may not be able to get them perfectly ground up and may notice some bits of un-blended chick peas but I found that this provided a crunchiness to the finished product and wasn't bad at all. Then I added the rest of the ingredients (the honey, peanut butter, baking powder, vanilla extract...all but the chocolate chips) into the chick pea mixture. I then used an electric mixer to mix all the ingredients (but the chocolate chips) together. And wow did it ever look like cookie dough! I then added dark chocolate chips and mixed the cookie dough around with a spoon. I only used about 70-80grams of chocolate chips. You can use as many as you think your batter may need but I thought 90g worth of chocolate chips would be too much for the amount of batter I had. Just a side note: make sure you use gluten free baking powder if you have a gluten intolerance. Here is what the dough looked like: Now, we have a fan assisted oven so I preheated the oven to 160 degrees for the fan oven. The recipe also says to form the dough into balls but I decided to try shaping them like cookies for the first batch and dough balls for the second batch to see the difference (I was curious as to why the recipe said to make them as dough balls and not cookies).
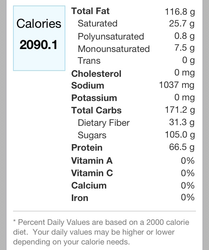
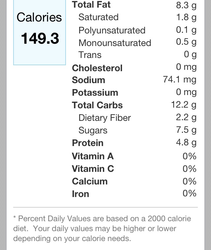
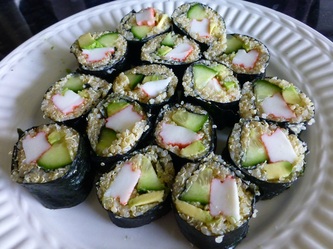
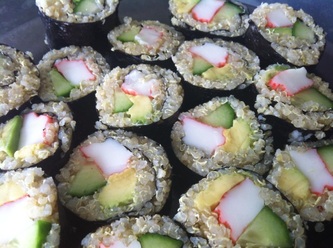
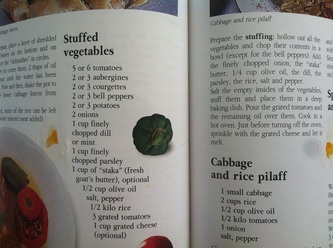
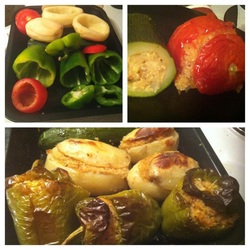
Make sure when you are working with the dough and forming them that your hands are wet as it helps make it less sticky and form them easier. I found that at 160 degrees (fan oven), they took about 20 minutes to bake rather than the 10 it says in the recipe. But if you have a regular oven then it may only take 10 minutes. I kept checking on them and they were still quite soft and didn't seem to be cooking but after about 20 minutes, I decided to take them out (both the cookies and dough balls) and let them sit for a couple of minutes and they became firmer. While they are cooking, you will notice that the cookies crack (similar to that of a ginger snap) but they still manage to stay together. I am pretty sure you don't need to worry about overcooking them as they don't seem to burn easily. The cookies were a complete success and absolutely delicious and quite peanut-buttery(obviously). The recipe does not yield many cookies, but I assure you that they will fill you right up and you definitely do not need many. They are VERY rich (but maybe that is because I used dark chocolate chips) and I made these before making dinner. After eating 2, I was absolutely FULL without a need for dinner, so feel free to form them quite small. If I use dark chocolate chips again, I will probably put a smaller amount as they are very rich. As you can see in the photo below, the cookies I made were average size so it may be a good idea to make them smaller. The dough ball size is actually perfect (and maybe that is why the recipe encourages the dough to be formed into a ball rather than a cookie) but I found that it doesn't affect the baking process if you flatten it out and shape it like a cookie. I have become a big fan of this recipe and will definitely be making these cookies again in the future. Highly recommended! They also take very little time to make. It must have taken about 10 minutes at the most to prepare the batter. And the best part about this recipe: You can lick the beaters all you want as there is no raw egg in the mix! Let me know if you try them and how they turn out or if you have any questions! Photos and calorie count below. Click on the images for a description! Enjoy and Happy Cooking! I was introduced to quinoa on my first visit to organic/health food store and vegan/vegetarian restaurant Sweet Cherubim on Commercial Drive in Vancouver, BC. I like the sound of healthy foods, even though I am no expert, and was told of all the great health benefits of this grain, so I gave their quinoa salad a try and was in food heaven. It was fresh, light, and just plain delicious. Since then, I have tried to substitute all recipes that use rice or cous cous with quinoa. It hasn’t been very easy to do this in the UK as quinoa was not always easy to find, but somehow in the last few months I have started finding it in large grocery store chains (Sainsbury's, Asda, Waitrose, Co-Op etc) and not just health food stores. This means that it is quite affordable (although I did find some independent health food stores had it very reasonably priced). I also find that it has been getting a lot of mention in magazines and various articles so I guess the Brits are starting to try it out! As mentioned, an easy way to use quinoa is to just substitute the “rice” ingredient in any/most recipes. My favorite dish where I apply this “rule” is sushi rolls. They are really easy and quick to make and I have even made a silly little instructional video to show you how (sorry for the really poor quality): 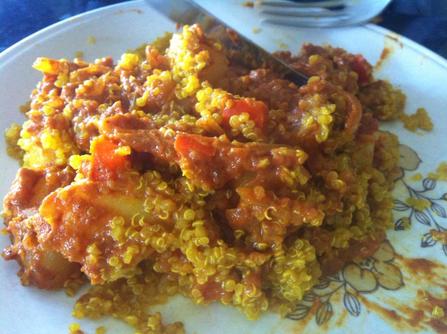 Other dishes I have used quinoa in is curries. I add a little bit of turmeric to the water that I cook the quinoa in and, as it simmers, the turmeric (which also seems to have many health benefits) is absorbed into the quinoa. Pile your curry on top and voila! And yet another dish that is fantastic with quinoa: Greek “Yemista” or roasted stuffed vegetables. I used a recipe from a book called Cretan Cooking (by Maria and Nikos Psilakis) (see image below - click to enlarge) that my mother gave me. It doesn't say to pre cook the quinoa or rice but I did pre cook it as I found it easier to work with. I also used dried mint and parsley as I didn't have any fresh in stock. I also omitted the butter and the grated cheese. If you are a meat-eater, you can always add ground beef to this recipe and you will find many Yemista recipes online with ground beef in the ingredients. So there you have it: A South American grain used in a Japanese dish, an Indian dish and a Greek dish. Quinoa really is versatile. What is your favorite way to use quinoa? And just in case you have no clue how to pronounce the word “quinoa” (I sure didn’t the first time I saw it), here you go: Enjoy and Happy Cooking!
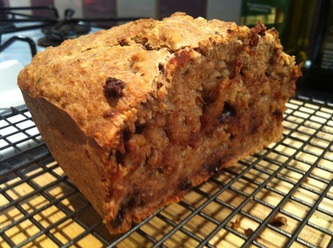
I was quite curious about this recipe, so I gave it a try about a year ago. No sugar, no eggs, no milk! So perfect for those lactose intolerant folks out there! I followed this recipe from BBC GoodFood: Ingredients:
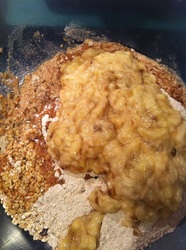
It serves 10 depending on how big the pieces are. I cooked mine in a loaf tin and yes it could serve 10 but the pieces would be quite thin. I input the ingredients into MyFitnessPal, a calorie counter app that I sometimes use to, well...count calories! Anyways, I input the serving amount as 9 so if you dish out 9 servings from the final amount, it equals to 219 calories per serving. If you have 5 servings out of it, that is 395 calories per serving. If you would like to do the math for another amount of portions, the entire loaf is 1973 calories. Divide 1973 by the amount of portions you get out of the final product and you will get your calorie count. So basically, measure out your portions accordingly ;-) My notes about this recipe: I found it to be a very simple recipe to make. I read the comments on the recipe page which have great suggestions and I did as one had done: I only put half the amount of oil and used water to replace the other half. It is very moist and quite rich with the almond extract and I also added vanilla extract to experiment. And I threw in about 50g of dark chocolate chips (so I guess there is sugar in those-oops!). I also didn't put in many walnuts and I omitted the raisins completely as I am not a huge fan of raisins. I may try the honey and carrot idea that someone suggested in the comments. If anyone else tries this, let me know how it turns out!! Happy Cooking! 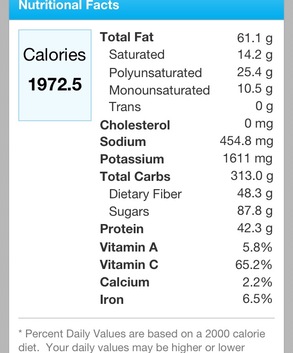 And here are the rest of the nutritional facts about this "Healthy" Banana Bread as calculated by MyFitnessPal (all will be approximate) and again, these facts are for the ENTIRE loaf so don't freak out too much. Again, if you would like to know the nutritional facts per portion, divide the numbers by the number of portions you get out of the finished product! Enjoy! |
Food Categories
All
Archives
November 2016
|
Oh, Poppycock! - Life. Adventures. Merriment



 RSS Feed
